📶 Progress setup
Now that the structure is all set up, we can start to focus on the progress value that we want to get on scroll. We'll be using the data-scroll-module-progress in the end but for testing purposes we can start with data-scroll-css-progress and make sure everything works properly before going further.
<figure
    class="c-fancy-gallery"
    data-scroll
    data-scroll-css-progress
    >
    <div class="c-fancy-gallery_sticky-area">
        <div class="c-fancy-gallery_sticky">
            {# ... #}
        </div>
    </div>

    <div class="c-fancy-gallery_spacer">

    <figcaption class="c-fancy-gallery_caption">
        {# ... #}
    </figcaption>
</figure>
With that, we can see the --progress CSS variable on the c-fancy-gallery element updating in our inspector, great!
If you want to see the progress inside the website instead of lurking in the inspector, you can add this over-engineered snippet to your CSS:
.c-fancy-gallery_sticky {
    // ...
    counter-reset: progress calc(var(--progress) * 100);

    &:before {
        display: block;
        content: counter(progress); // Use counter hack because `content` only allows strings, not numbers :(
        position: absolute;
        top: 0;
        left: 0;
        color: chartreuse; // iykyk
        z-index: 9999;
    }
}
This snippet uses counter because the content property on :before/:after pseudo elements only accepts String as an input. Our --progress variable is a Float so that hack is what we found to convert it to a String in native CSS
Adjusting the offset
It's now working but the boundaries need some adjustments: we want the progress to start incrementing (from 0) when the top part of our element reaches the top of the viewport, and we want it to end (reach 1) when the bottom of the element reaches the bottom of our viewport. For that we can use data-scroll-offset (documentation)
<figure
    class="c-fancy-gallery"
    data-scroll
    data-scroll-css-progress
    data-scroll-offset="100%,100%"
    >
    <div class="c-fancy-gallery_sticky-area">
        <div class="c-fancy-gallery_sticky">
            {# ... #}
        </div>
    </div>

    <div class="c-fancy-gallery_spacer">

    <figcaption class="c-fancy-gallery_caption">
        {# ... #}
    </figcaption>
</figure>
Now our boundaries are properly set up: time to dig in Javascript!
Adding a JS module and make it listen to progress
Time to create a new JS module! We'll start things off easily with just a log of the progress to make sure everything works as it should. Let's create FancyGallery.js:
import { module } from 'modujs'

export default class extends module {
    constructor(m) {
        super(m);
    }

    init() {
        // Nothing yet
    }

    // This method will be called automatically by `data-scroll-module-progress`
    onScrollProgress(value) {
        console.log(value)
    }
}
Now we need to add our module to the markup and as stated before, we're also going to use data-scroll-module-progress. Let's add it to our markup:
<figure
    class="c-fancy-gallery"
    data-module-fancy-gallery
    data-scroll
    data-scroll-css-progress
    data-scroll-module-progress
    data-scroll-position="100%,100%"
    >
    <div class="c-fancy-gallery_sticky-area">
        <div class="c-fancy-gallery_sticky">
            {# ... #}
        </div>
    </div>

    <div class="c-fancy-gallery_spacer">

    <figcaption class="c-fancy-gallery_caption">
        {# ... #}
    </figcaption>
</figure>
data-scroll-css-progress & data-scroll-module-progress both listen to the data-scroll-offset settings so the output will be exactly the same in the JS progress!
We could get rid of data-scroll-css-progress now, in this instance we just keep it for practical purposes during the development: it's always nice to have an eye on the progress value!
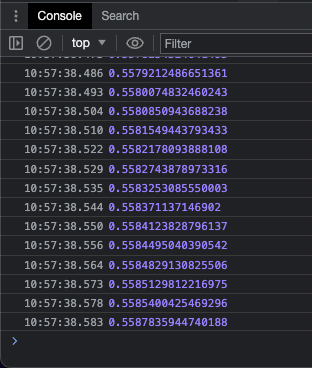
If we check in our console, it appears to be working, great!
Having access to this data in Javascript brings so many possibilities, one of them being linking that progress to a GSAP timeline. That's our next step by the way!